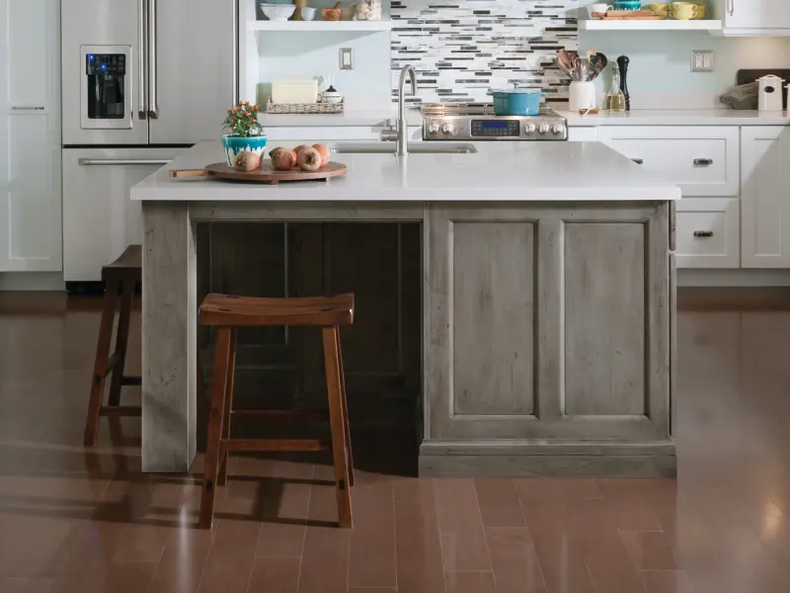
Installing kitchen island legs is a rewarding DIY project that can elevate the aesthetic and functionality of your kitchen. Whether you're updating your current kitchen island or adding a new one, the right kitchen island legs can make a significant difference. In this guide, we'll walk you through the process of selecting, preparing, and installing kitchen island legs to ensure a successful and satisfying result.
Why Choose Wooden Kitchen Island Legs?
Wooden kitchen island legs offer a timeless appeal and unmatched durability. At Highland Manor Wood Products, we take pride in crafting the highest quality wood furniture parts, including kitchen island legs, in our 100-year-old shop. Our wood turning expertise ensures that each leg is a work of art, adding elegance and stability to your kitchen island.
Step 1: Selecting the Right Kitchen Island Legs
Before you begin the installation process, it's essential to choose the right kitchen island legs that complement your kitchen's style and meet your functional needs. Here are some factors to consider:
- Style: Decide on a style that matches your kitchen's décor. Highland Manor Wood Products offers a wide range of designs, from classic turned legs to more contemporary options.
- Height: Ensure the legs are the correct height for your kitchen island. Standard kitchen islands are typically 36 inches tall, including the countertop. Measure your countertop thickness and subtract it from the total height to determine the leg height.
- Material: Our kitchen island legs are made from premium hardwoods, providing strength and beauty. Choose a wood type that matches or complements your existing furniture.
Step 2: Gathering Tools and Materials
To install kitchen island legs, you'll need the following tools and materials:
- Measuring tape
- Pencil and paper
- Drill with appropriate bits
- Screws or bolts (as specified for your legs)
- Level
- Wood glue (optional)
- Sandpaper (if needed)
- Finish or paint (if you plan to customize the legs further)
Step 3: Preparing the Kitchen Island Legs
Once you've selected your kitchen island legs, it's time to prepare them for installation:
- Inspection: Check each leg for any defects or imperfections. Highland Manor Wood Products quality control ensures that our products are free from major flaws, but it's always good to double-check.
- Sanding: If needed, lightly sand the legs to smooth out any rough spots. This step ensures a clean and polished look.
- Finishing: Apply your chosen finish or paint to the legs. This step is optional, as our legs are available in various pre-finished options. Allow sufficient drying time before proceeding.
Step 4: Positioning the Legs
Proper positioning of the kitchen island legs is crucial for stability and aesthetics:
- Marking the Spots: Place the kitchen island top upside down on a flat surface. Measure and mark the positions where the legs will be attached. Ensure that the legs are evenly spaced and aligned with the corners or edges of the island.
- Pre-Drilling Holes: Using a drill, pre-drill holes at the marked spots. This step prevents the wood from splitting and makes it easier to attach the legs.
Step 5: Attaching the Kitchen Island Legs
With the legs prepared and the holes drilled, you're ready to attach the kitchen island legs:
- Aligning the Legs: Position each leg over the pre-drilled holes. Ensure they are straight and aligned with your markings.
- Securing the Legs: Insert screws or bolts through the legs and into the island top. Tighten them securely, but avoid over-tightening, which can damage the wood. If you're using wood glue for additional stability, apply it to the top of each leg before attaching.
Step 6: Final Adjustments and Leveling
After attaching the kitchen island legs, it's time to make final adjustments:
- Checking for Level: Use a level to ensure the island top is even. Adjust the legs as needed to achieve a level surface.
- Tightening Screws: Double-check all screws or bolts to ensure they are tight and secure. Make any necessary adjustments to keep the legs firmly in place.
Step 7: Adding Finishing Touches
To complete your kitchen island project, consider these finishing touches:
- Touch-Up Paint or Finish: If any areas were scratched or scuffed during installation, touch them up with paint or finish.
- Protective Pads: Attach protective pads to the bottom of the legs to prevent scratching your floor.
- Decorative Elements: Add any additional decorative elements, such as trim or molding, to enhance the overall look of your kitchen island.
Maintenance Tips for Wooden Kitchen Island Legs
To keep your kitchen island legs looking beautiful for years to come, follow these maintenance tips:
- Regular Cleaning: Wipe the legs with a soft, damp cloth to remove dust and spills. Avoid using harsh chemicals that can damage the wood.
- Periodic Inspections: Check the legs periodically for any signs of wear or loosening. Tighten screws or bolts as needed.
- Reapplying Finish: Depending on the wear and tear, you may need to reapply finish or paint to keep the legs looking fresh and vibrant.
Why Highland Manor Wood Products?
Choosing Highland Manor Wood Products for your kitchen island legs ensures you receive the highest quality craftsmanship and materials. Our commitment to traditional wood turning techniques and modern design ensures that every product we create is a masterpiece. Explore our online store to find the perfect kitchen island legs for your next project.
Conclusion
Installing kitchen island legs is a manageable DIY project that can significantly enhance the look and functionality of your kitchen. By following these steps and using high-quality legs from Highland Manor Wood Products, you'll achieve a professional and stylish result. Whether you're a seasoned DIY enthusiast or a beginner, our kitchen island legs are designed to make your project a success. Visit our online store today to browse our extensive collection and start your journey to a beautiful kitchen island transformation.

